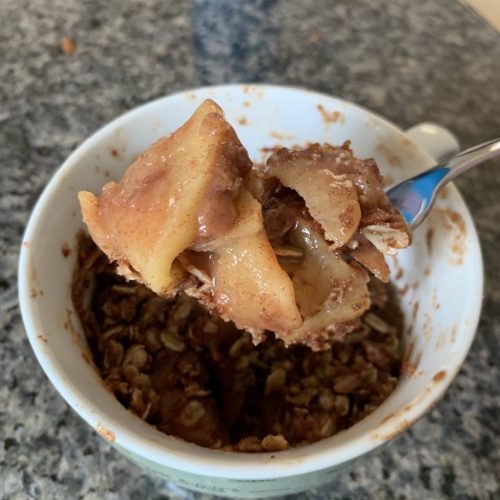
Searching for easy recipes that take little to no cooking is tricky, but luckily I stumbled upon this Easy Microwave Apple Crisp in a Mug.The other plus is that this recipe contains very few ingredients, most of which are ones you might just have at home: oats, flour, brown sugar, cinnamon, an apple, and some butter. Also for microwave recipes, this turned out really good and there was no “eat this right away or it will become a rock” rule like you often find with mug cakes and cookies.
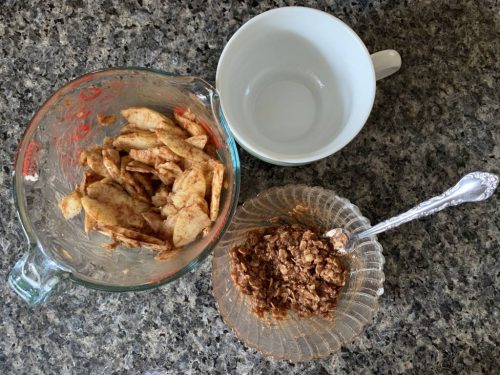
Once you’ve assembled all your ingredients and tossed them together you should have something that resembles this lovely trio.
Overall the recipe listed on the site is super easy to follow, however here are a few key tips:
- Pick a nice deep mug to assemble your crisp in, the wider the better. If it resembles a mini bowl then it’s perfect!
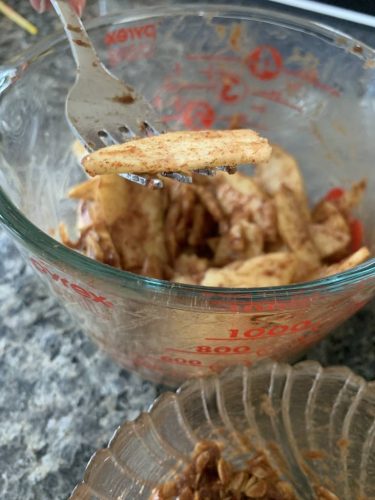
- Make sure to cut your apples nice and thin, the recipe does note this in the ingredients list, but if you’re using a microwave to cut down on cooking (and cook time) it’s super important. The easiest way to do this is to cut the apple in half after peeling it, cut out the core, and then slice as thin as you can. So after you’ve sliced and tossed the apple in the butter, cinnamon, and brown sugar mixture it should resemble something like this. You’ll likely end up with some pieces of apple that are little scraps and some that are slightly thicker, that’s okay! Just aim for thin slices and you’re golden. If you’re used to apple slices from the store and those are what you have on hand, go ahead and try it out, but you will need to cut those in half or maybe even thirds.
- If you’re a cinnamon lover like myself then don’t worry about measuring the 1/4 tsp out as suggested. Just eyeball adding that. The recipe notes that you can add more brown sugar or cinnamon according to your taste.
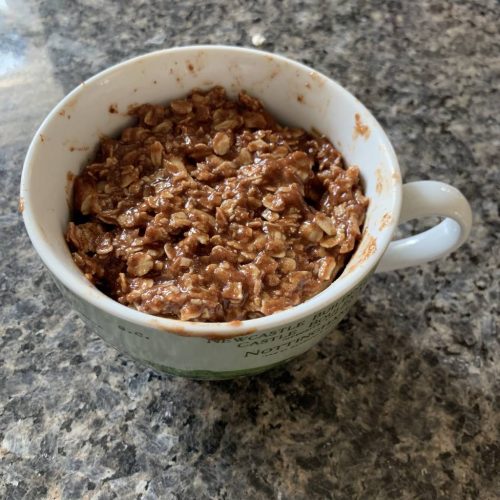
Once you assemble your crisp before you pop it in the microwave you should have something like this. I think my crumble ended up a little on the wet side since it had a little extra butter than what was called for, but that’s alright it still came out really good!
I would say that this was a tasty success and very easy to make! It also seems to be fairly forgiving, so if you need to make it healthier, gluten free, or dairy free here are some substitute ideas for you:
- dairy free: vegan butter or margarine (if you want something that matches butter the best I would recommend Miyoko’s European style cultured vegan butter -> this is what I used)
- gluten free: sub the flour with your favorite gluten free flour blend
- healthier: sub the brown sugar with something lower on the glycemic scale and less processed that still resembles brown sugar in flavor, like coconut or date sugar
SHARE THIS: